
Do you have those hobbies that you think fondly about and love doing, but just never seem to have the time for anymore? Once I started my business, I began finding it harder to fit my hobbies into my schedule. I think this was because it felt like any time I was free and able to do something, it should be aimed towards my business and progressing it. My unmonetized hobbies were pushed to the back and it was only over my free time at Christmas that I found some time to get back to drawing.
I studied art for many years in school before ultimately choosing textiles at University level, and a lot of the art that I loved was drawing. It started with graphite pencils, and went on to coloured pencils, usually featuring my favourite subject matter: animals!
Why It's Important to have Unmonetized Hobbies
This is just my opinion, but after purely working on my business for a while and perhaps squeezing in a swim sometimes, I am a firm believer that some things should be for fun and nothing else.
I manage to convince myself sometimes that because I enjoy my surface pattern design, or sewing, or even marketing, that it isn't really 'working' so I don't really need downtime from it. However, since taking some time out at Christmas and drawing, playing video games, and learning how to knit, I've realised that that break away from things can really help my productivity and now feeling stuck.
So in the spirit of rediscovering old hobbies and finding new ones, I learnt to knit over Christmas and also got some crochet hooks, I'm hoping to slowly make some nice homeware things for myself. I've borrowed a puzzle, again something that's going to take me a LONG time. Despite loving detailed drawing and sewing, I'm so impatient with puzzles. And obviously drawing, which I would love to improve more and maybe make some art for my own walls.

So here's the piece I spent the first week of January working on, you may have seen it on my Instagram. It features the red squirrel, hedgehog, dormouse and hare, the four endangered or declining species that my collection focuses on.

EYE TUTORIAL
I got complimented on the eyes on Instagram, which is amazing because I love doing them. I start them off with quite a strong black border, usually using a sharper pencil to get a nice sharp edge to them.

Then I draw where I want the reflection to be, this makes such a difference to adding some life to the eyes.

I then add a bit of colour into them, mostly blue but it would work with any colour you want. I also use grey to fade it out and soften it a little.
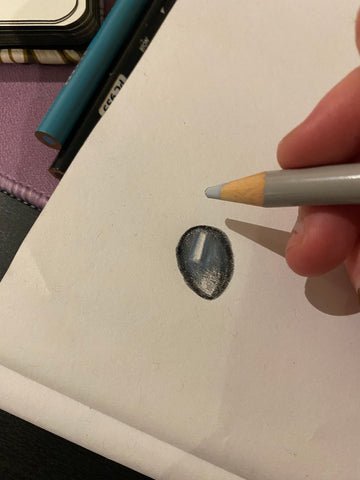
I then add more black to finish it off, with a lighter grey over the top to smooth it out and shade it into the lighter colours from the back.

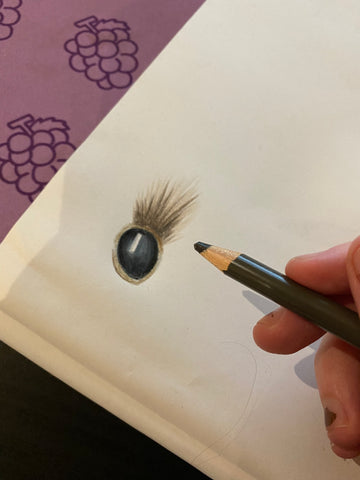
I then tend to expand my drawings outwards from the eyes, most animals have some kind of eyelid or visible skin around the eye not quite covered by fur, which I think is quite important to add into it.

So there we go! A quick tutorial on how I do my eyes. I'd love to improve this over time, I'd love to do the corners of the eyes better and more detailed. and also add more wetness to them which I think will take some studying of some bright outside photos.
HAIR TUTORIAL
I usually do hair a couple of ways, and this depends on whether you want it to look kinda dense, or soft and fluffy. But both techniques start in a similar kind of way. Typically I stick to three shades when drawing basic hair, although this can go up depending on shades, like the red squirrel which needed 3 shades of brown, two of orange and two beige/greys.

So first of all I add the strokes with the lightest colour. I often do a large area like this while I work out which direction the fur should be going. I then make sure that the pencil is sharp when I add those ends of the hair, as some of these will be left exposed in this light shade.

Next, I add the medium shade, I add this at the base of where the hair has come from, and drag some of it through to the ends of the hair.

Then I add the darkest shade at the base, this may also need to be darkened and pulled into the layer behind it, to make it appear like this tuft of hair is coming from underneath another.
If I am going for the soft and fluffy approach, I wouldn't add too much more to this, just a few darker strands the full length of the tuft. But if I wanted a denser appearance to it, I would repeat the last few steps with the medium and dark shades at the ENDS of the hair too. This gives it more of a 3D look with a gleam in the middle. If you look at photographs of hair, this is often what happens. Not always with animals if they have short textured hair, but I do not always stick immediately to reference photos, rather what looks good at the time.

So there we go! I'd love to see if any of the above techniques work for anyone else, I'm excited to carry on my pencil drawing and hopefully improving more! I would love to do a photorealistic piece one day, but that may be a way off!


