
Scrunchies are everywhere at the moment aren't they? A throwback to another decade, these outfit additions have sprung up and boomed on the markets, online, small businesses and high street alike.
For a small piece of fabric and some elastic, they sure can look extremely different and unique. We see them with pom-poms attached, long scarf-like flowing ends, lighting up, so many people have found ways to make their scrunchies unique and I'm here for it.
Hair accessories also make a great gift, as I mentioned with how unique they can be, there's got to be something out there for everyone. But what if you had a perfect step-by-step plan to make one for your bestie this Christmas?
First Step
Gather up your materials!
- A piece of fabric, roughly 50cm by 12cm, a good starter fabric is cotton or something lightweight and easy to sew through
- Roughly 5 Inches of elastic, I use thin flat elastic ( Pop me a message if you want a link to exactly what I find works well!)
- A sewing machine or a needle and thread ( My tutorial will be on the machine, but can also be done handsewn )
- An iron and board
- A safety pin
Second Step
Get started!


Using the safety pin to help you navigate through the tunnel, gather the fabric up onto the elastic until you have both ends of the elastic in your hands, with all the fabric bunched up on the elastic between. Now tie the elastic together in a tight, secure knot. We should now basically have a scrunchie, except it has an opening where the two ends of the fabric have come around to meet.

Now, we put one end of the fabric inside the other, again this is where we put our neat 12cm fold at the start to good use, because that neat ironed edge hides the other edge of the fabric inside it. Then add a little line of stitching down it, this secures the scrunchie and hides the elastic, completely your project.
I used to worry at this stage that sewing through the two layers of fabric and the elastic on this last step would effect its ability to tie or something, but it doesn't, and actually I found handstitching the seam, while I could hide the stitches more, actually did not last as well over time as these solid ones, which get hidden in the scrunch of the final product anyway.
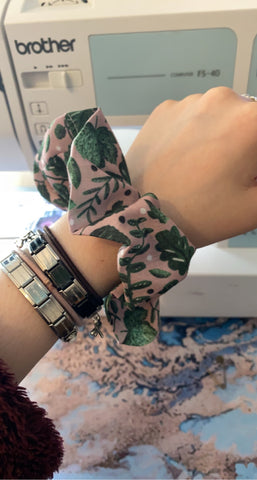
So there we have it! This is one of probably a dozen ways to make a scrunchie, but my favourite way to get the job done. Some alterations that can be made if you want something a little different can be playing around with the measurements. If you want a wider scrunchie, do more than 12cm. If you want more scrunch to your scrunchie, increase the 50cm to more, and so on.
I'd love to see the finished result if anyone decides to make them this year!


